- Veeva RIM Basics Admin or Submission Manager
This work instruction is for Vaults with a Veeva RIM Basics: Submissions Publishing license.
After the Application and Application Relationships are created, you can create a Submission and Regulatory Objective and associate the product family relationships to them using the Submission Wizard.
A submission represents the actual set of documents that will be sent to the Health Authority for their review. You can launch the Submission Wizard from the Application to easily create your Submission.
Create a Submission
To create a submission for an application:
-
Open the Application record and select Submission Wizard from the All Actions menu.

-
Select Create Submission from the Submission dropdown. (Alternately, you can select an existing submission from the dropdown.)

-
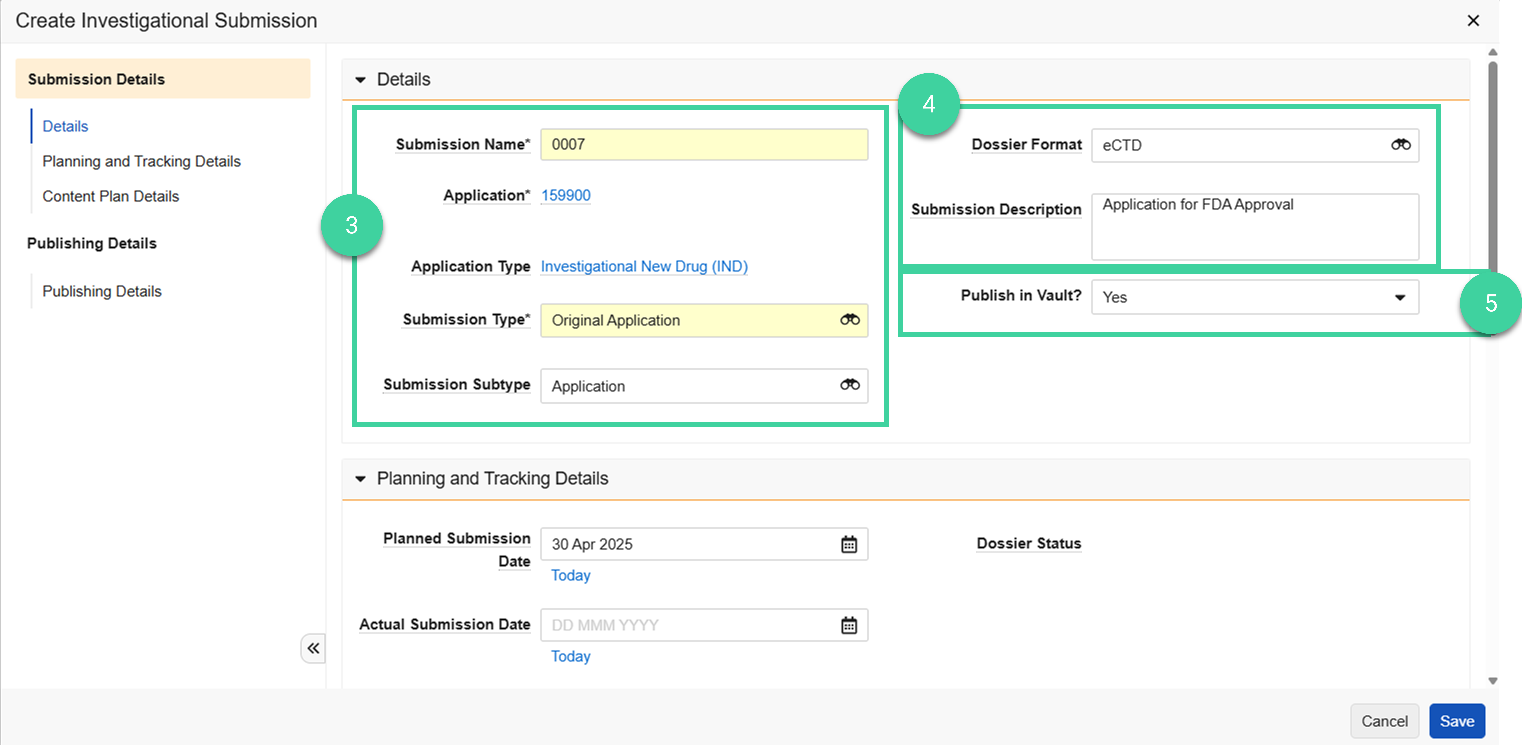
Enter the submission details. It is very important to include the number of your submission sequence in the Submission Name.
-
Specify the Dossier Format and enter a Submission Description.
-
Answer Yes to Publish in Vault to use Veeva RIM Basics for publishing and validating the submission against agency-specific rules.
-
Specify the Planned Submission Date.
-
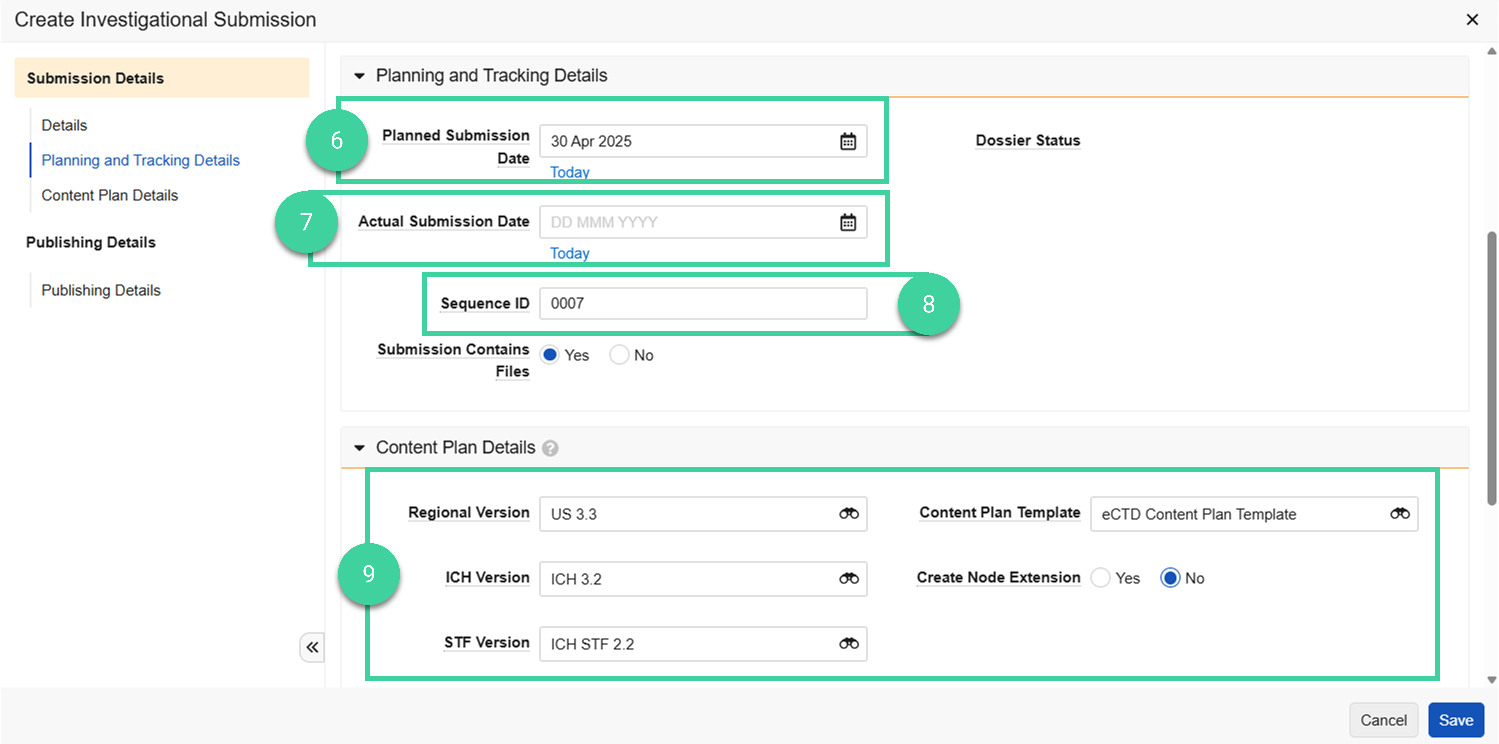
After the submission is transmitted to the Health Authority, return here to record the Actual Submission Date.
-
Enter the Sequence ID. For an eCTD submission, enter the sequence number. Make sure that it matches the sequence number you entered in the Submission Name. For a non-eCTD submission, enter the submission name.
-
The Content Plan Details default from the Application.
-
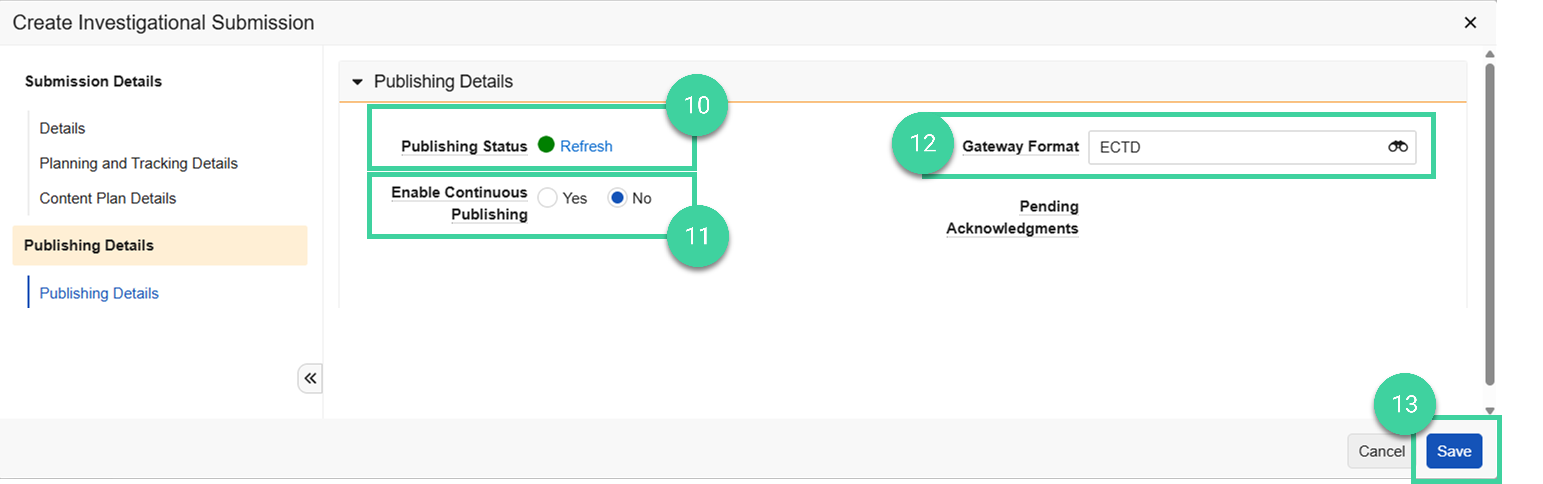
The Publishing Details section becomes available when Publish in Vault is set to Yes. Once you have enabled Continuous Publishing, you can monitor the Publishing Status here.
-
Initially, leave Enable Continuous Publishing set to No. Return to the submission and set it to Yes when you’re ready for Vault to continuously publish and validate your submission.
-
If your Vault is configured to transmit your submission directly to the health authority through the electronic gateway, specify the Gateway Format.
-
Click Save.
Create a Regulatory Objective
As part of sending your Submissions to the Health Authorities, you need to ensure that you’re meeting your regulatory goals. Regulatory Objectives help you track the ongoing regulatory goals to be met for a given application across one or more submissions, the status of reaching those goals, and key dates pertaining to that goal. For example, you can use Regulatory Objectives to manage CTR/CTIS Applications.
You can associate multiple regulatory objectives to a submission.
-
In the Submission Wizard, select Create Regulatory Objective from the Regulatory Objective dropdown.

-
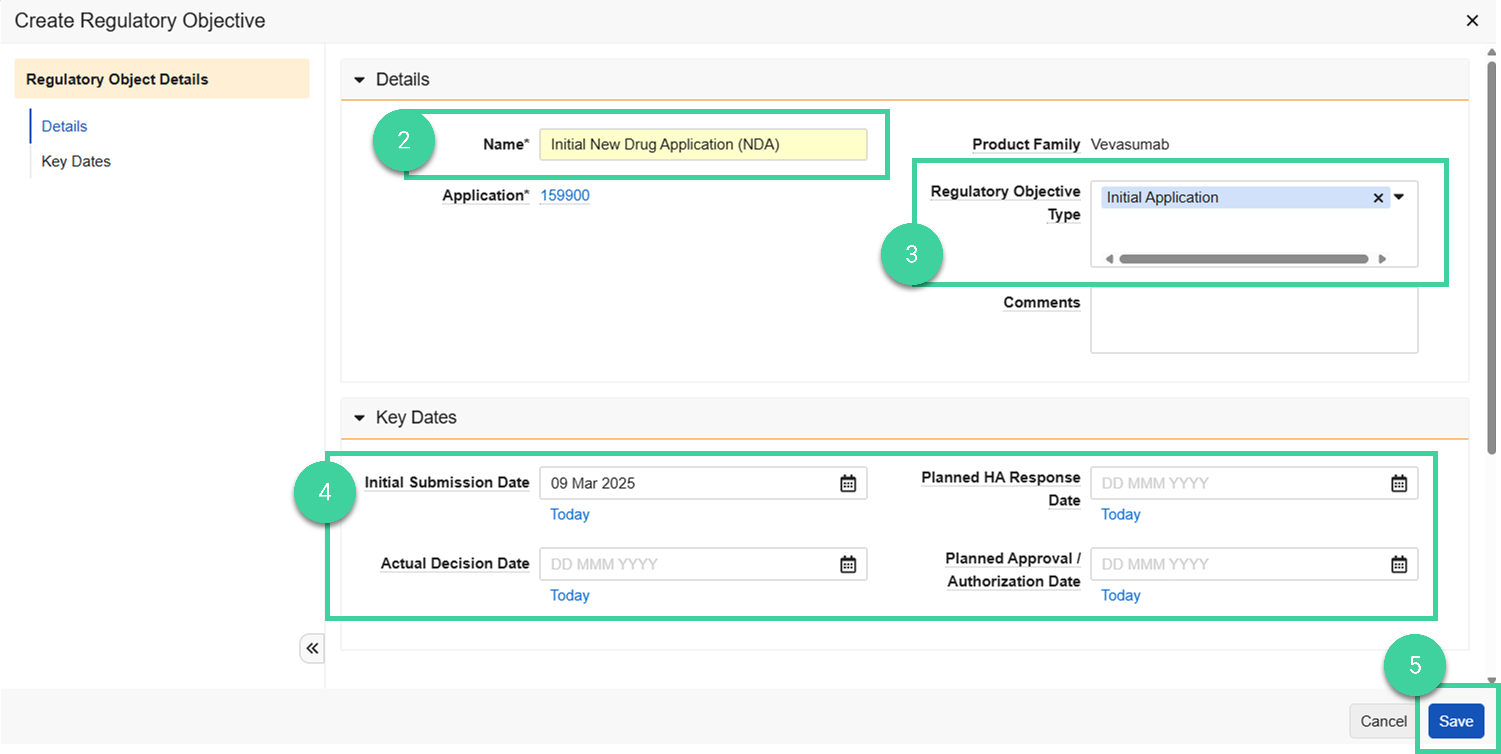
Enter a Name for the regulatory objective.
-
Specify one or more Regulatory Objective Types.
-
Specify the Key Dates. These can be estimated.
-
Click Save.
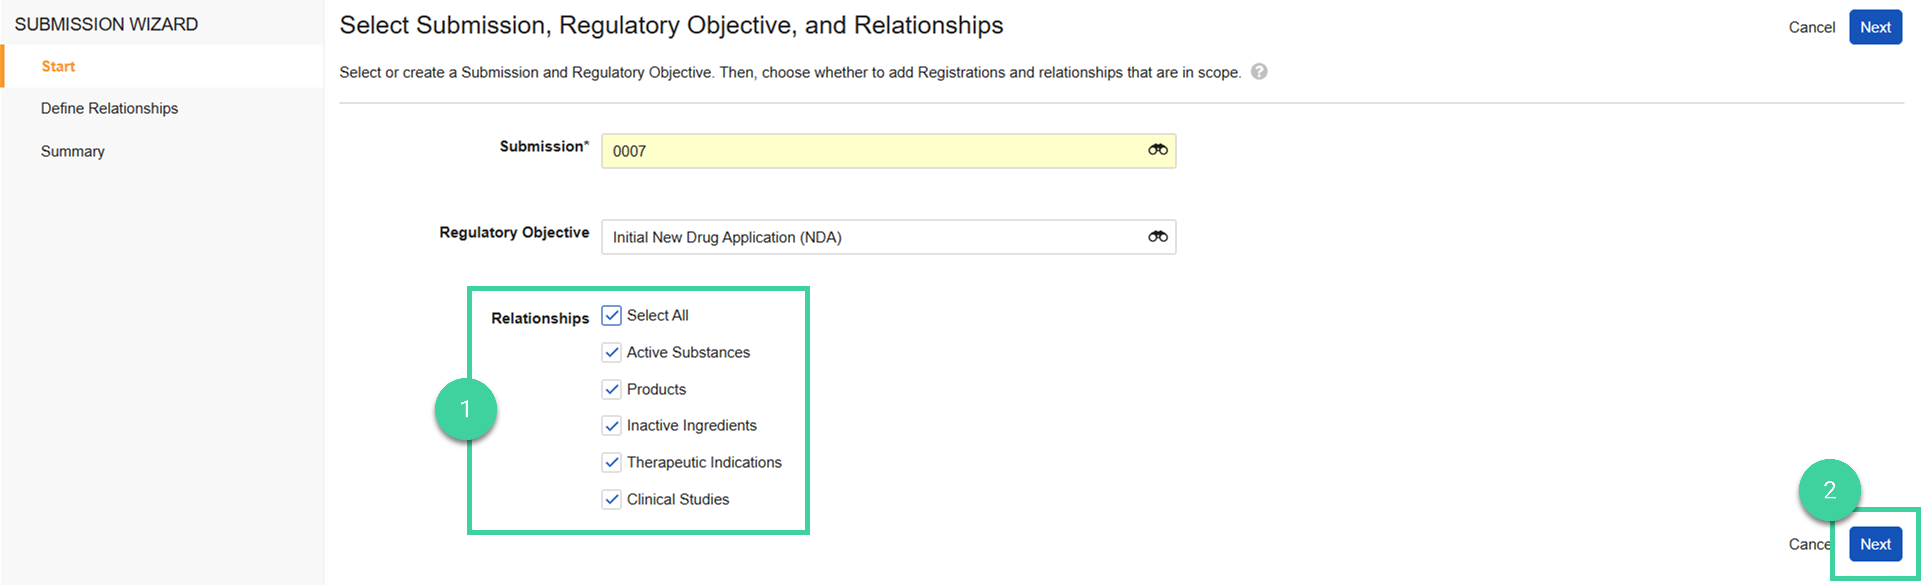
Define the Relationships
-
Select which Relationships you want the wizard to create.
-
Click Next.
-
For each relationship you selected, click the checkbox of the specific relationship you want to add to the submission.
-
Click Next to continue to the next selected relationship.

-
Once you have moved through all selected relationships, review the Summary.
-
Click Finish.
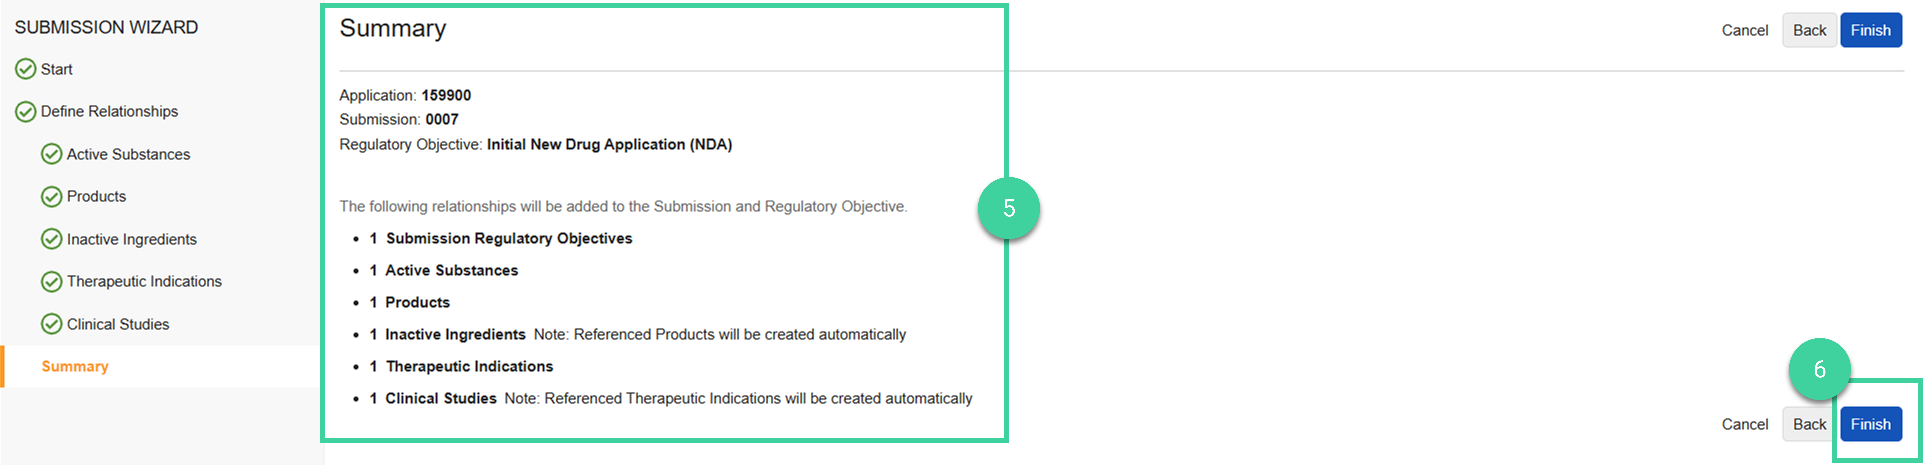
The submission is in the Planned state.