- Vault Admin designated as Domain Admin
Single Sign-On (SSO) is a process that allows users to access multiple authorized applications without having to log in separately to each application. SSO allows organizations to validate user names and passwords against a corporate user database (such as Active Directory), rather than having separate user credentials managed by Vault and other applications. In Vault, some users may be configured to use SSO, while others use traditional usernames and passwords, meaning that an organization could use SSO for internal users and not for external users.
Okta Setup
Prerequisites:
- An Okta developer account.
- Domain Admin access in the target Vault.
To set up Single Sign-On in your Vault using Okta:
- Log into Okta as an Okta Administrator.
- Expand the Applications dropdown in the menu bar on the left-hand side and select Applications.
- Click the Browse App Catalog button in the Application screen.
- In the search bar, type in Veeva Vault.
- Click on the Search result with name Veeva Vault and click the Add Integration button.
-
Under General Settings, enter the following details (leave checkboxes on default selections), then click Next:
- Application Label: Veeva Vault
- Your Veeva Vault URL: The target Vault URL
-
In the Sign-On Options screen, verify the following:
SIGN ON METHODS
- SAML 2.0: Selected
- Click on the View Setup Instructions button.
- Read the View Setup Instructions screen and copy down the following information:
- SP Entity ID
- Identify Provider Certificate
- Identity Provider Login URL
- SP-Initiated Request URL
- SP-Initiated Request Binding
- Signature and Digest Algorithm
- Okta logo
- Log into your Vault as a Domain Administrator.
- Navigate to Admin > Settings > SAML Profiles
- Click Create and select Single Sign-On Profile.
-
Enter the following details, then click Save:
- Label: Okta
- Status: Active
- SAML User ID Type: Federated ID
- SP Entity ID: <Populate from Step 10>
- Identify Provider Certificate: <Select the X.509 Identify Provider Certificate from Step 10>
- Identify Provider Login URL: <Populate from Step 10>
- SP-Initiated Request URL: <Populate from Step 10>
- SP-Initiated Request Binding: <Populate from Step 10>
- Signature and Digest Algorithm: <Populate from Step 10>
- Use Custom Login Button: Checked
- Logo Image: Upload Okta Logo
- Button Color: White
- Border Color: Blue
- Text Color: Black
- Navigate to Admin > Settings > Security Policies.
- Click Create and select Single Sign-On.
- Enter the following details, then click Save:
- Policy Name: Okta SSO
- Description: Single Sign-on for Okta
- Authentication Type: Single Sign-on
- SAML Profile: Okta
- Log out of your Vault.
-
Return to Okta’s Admin screen where the Sign-On Options screen is presented, and enter the following details, then click Done. Leave remaining fields in their default states.
SIGN ON METHODS
- SAML 2.0: Selected
- Default Relay State: Leave Blank
- Disable Force Authentication: Unchecked
ADVANCED SIGN-ON SETTINGS
- Your Vault SSO URL: <Populate from Step 14>
- Log out of Okta.
Azure/Entra Setup
Prerequisites:
- Admin Access within Microsoft Entra Admin Center.
- Domain Admin access in the target Vault.
To set up Single Sign-On in your Vault using Azure:
- Log into your Vault as Domain Administrator.
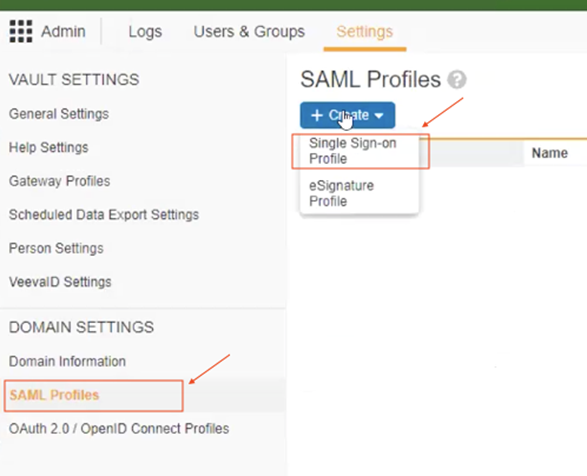
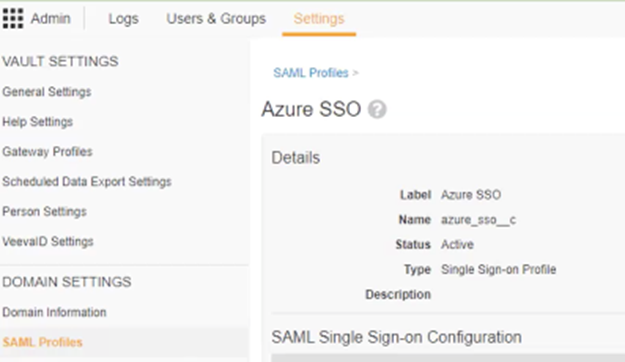
- Navigate to Admin > Settings > SAML Settings > SAML Profiles.
-
Click Create and select Single Sign-on Profile.
-
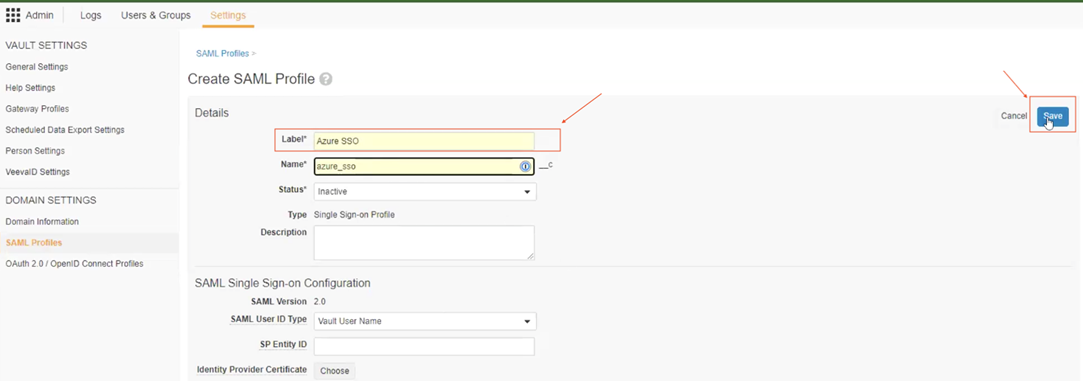
In the Label field, enter “Azure SSO.” Leave the rest as the default for now, we will come back to this section later
-
Click Save.
-
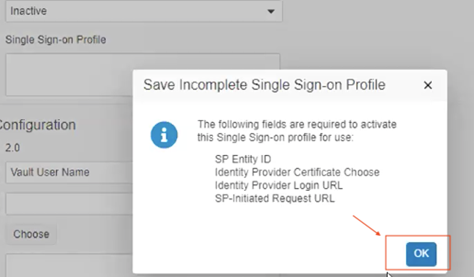
Dismiss the pop-up window by clicking OK.
-
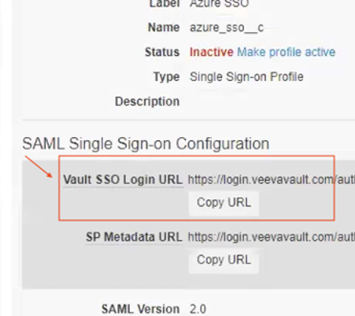
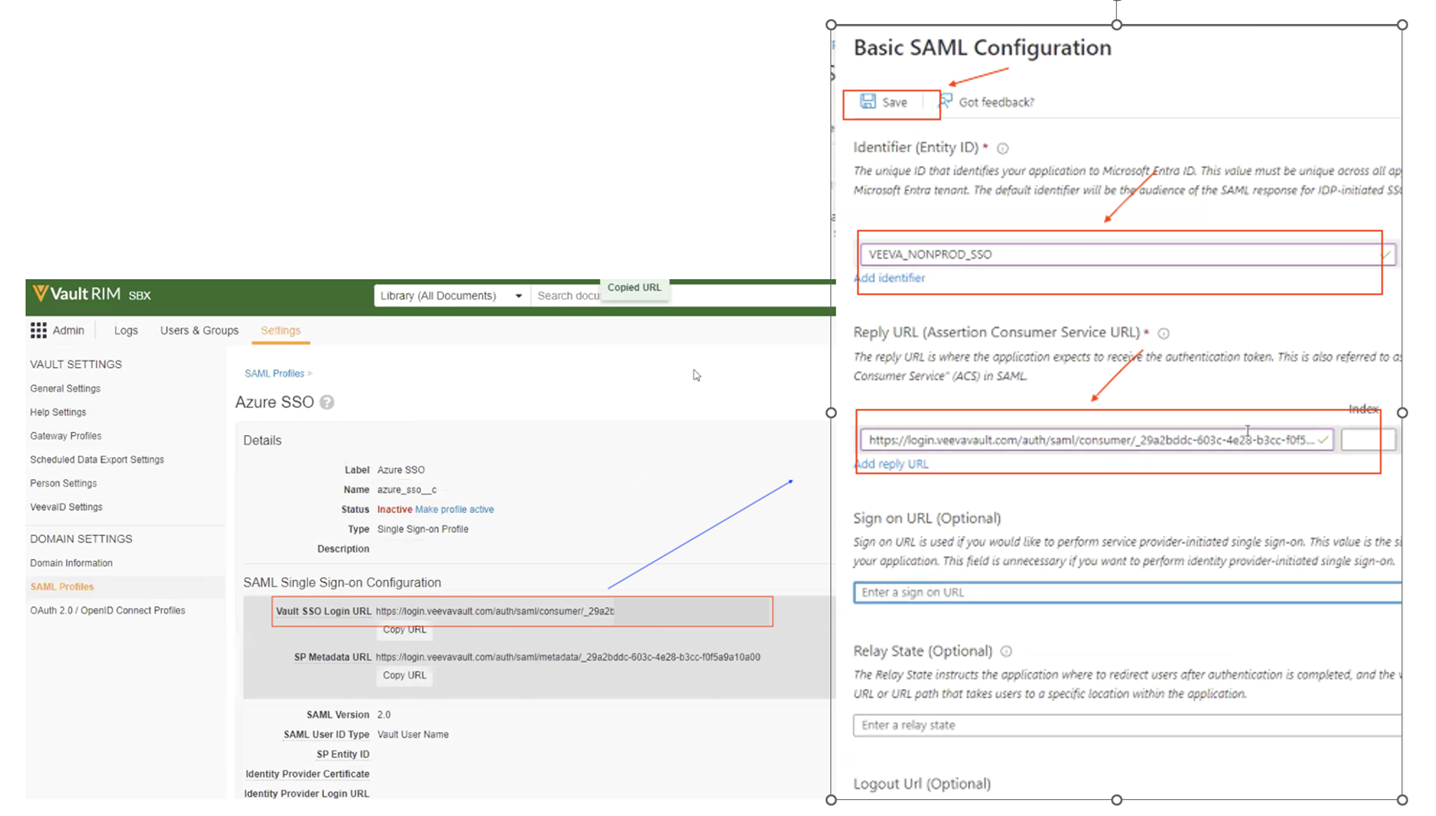
Copy the Vault SSO Login URL, as this is needed when creating the Azure Application.
- Login to Azure.
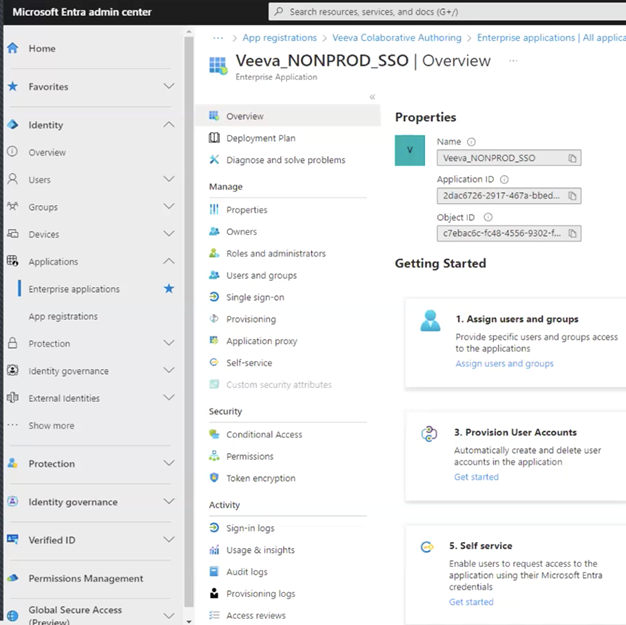
- In Microsoft Entra Admin Center, on the left-side menu click on Azure Active Directory.
- Click on the Enterprise applications menu in the Default Directory screen.
- Click on the New Application button in the top menu.
- Click on the Non-gallery application option under Add your own app.
- Provide a name (VEEVA_PROD_SSO, VEEVA_NONPROD_SSO, etc) and click Register.
-
Assign Users in Users and Groups (when ready to do so).
-
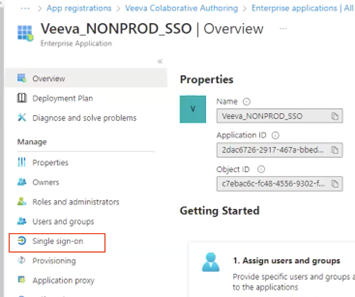
Click on Single sign-on in the left-hand menu under the Manage section.
-
Edit section 1, Basic SAML Configuration by clicking edit.
-
Enter the following details, then click Save.
- Identifier (Entity ID): VEEVA_NONPROD_SSO
- Reply URL (Assertion Consumer Service URL):
-
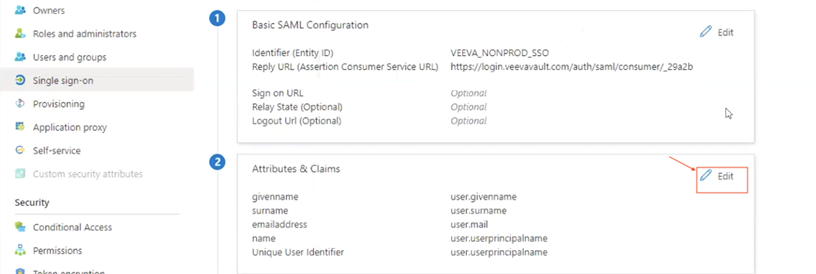
Edit section 2, Attributes & Claims by clicking edit.
-
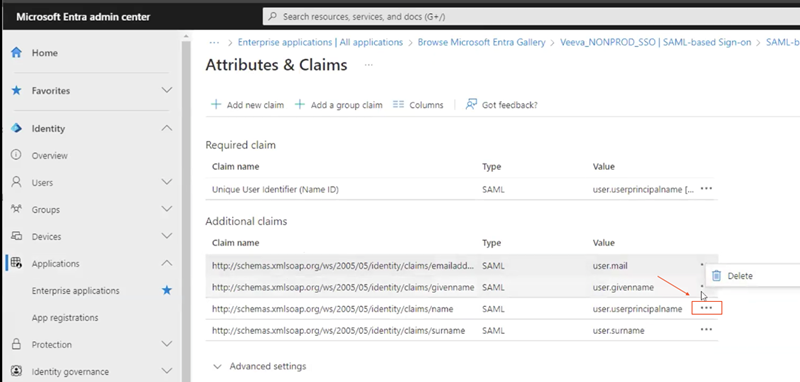
Remove all the default additional claims by clicking the Actions button (…) next to each claim and selecting Delete.
-
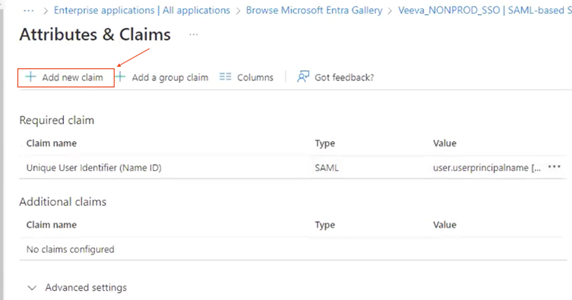
After all the Additional claims are removed, add a new claim by clicking Add new claim.
-
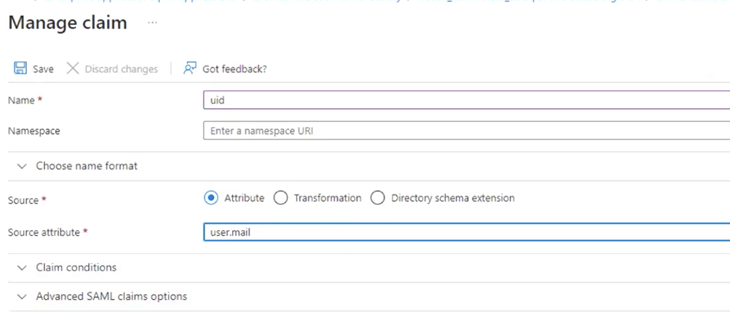
Enter the following details, then click Save.
- Name: uid
- Namespace: (leave empty)
- Source: Attribute
- Source Attribute: user.mail
-
After saving, Section 2 should now look like this:
-
Edit section 3, SAML certificates, by clicking edit.
-
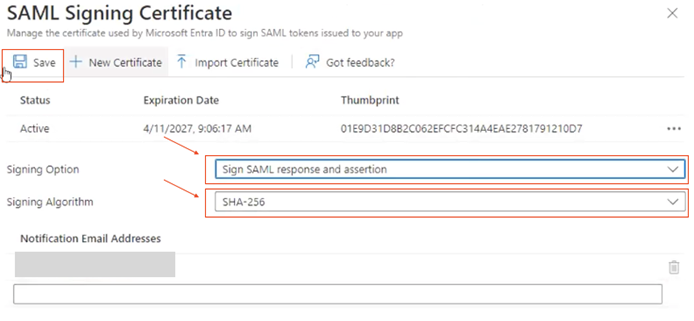
Enter the following details, then click Save.
- Signing Option: Sign SAML Response and assertion
- Signing Algorithm: SHA-256
-
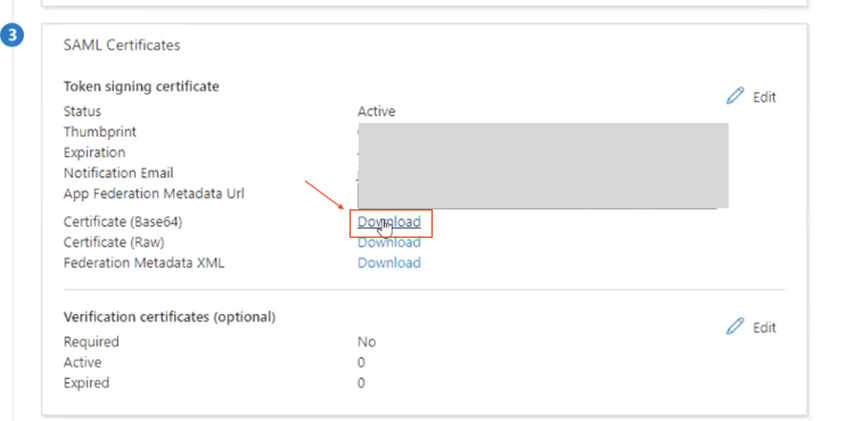
Download Certificate (Base 64) by clicking Download.
-
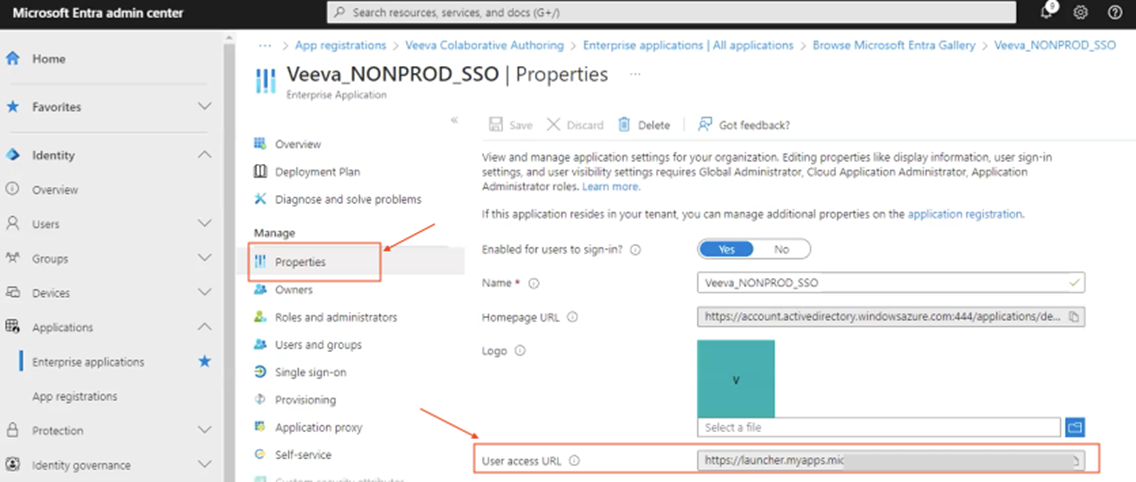
Navigate to Properties and copy down the User access URL.
- Log into the Vault you are configuring SSO for.
-
Navigate to Admin > Settings > SAML Profiles, then edit the SAML profile you created earlier.
-
Enter the following details:
- SAML User ID Type: Federated ID
- SP Entity ID: VEEVA_NONPROD_SSO (this setting matches Identifier (Entity ID) value set in Azure section 1)
- Identity Provider Certificate: Upload the certificate captured from section 3 of Azure Single sign-on
- Identity Provider Login URL: User access URL + &RelayState={{relay_state}}
- Identity Provider Logout URL: Logout URL from section 4 of Azure Single sign-on
- SP-Initiated Request URL: Login URL from section 4 of Azure Single sign-on
- SP-Initiated Request Binding: HTTP POST
- SP Certificate > Include the SP Certificate in the SP initiated request: Checked
- Signature and Digest Algorithm: SHA-256
- eSignature Authentication Context: None
- Authenticate SAML eSignature in a pop-up window rather than an iFrame: Checked
- Set Status to Active
-
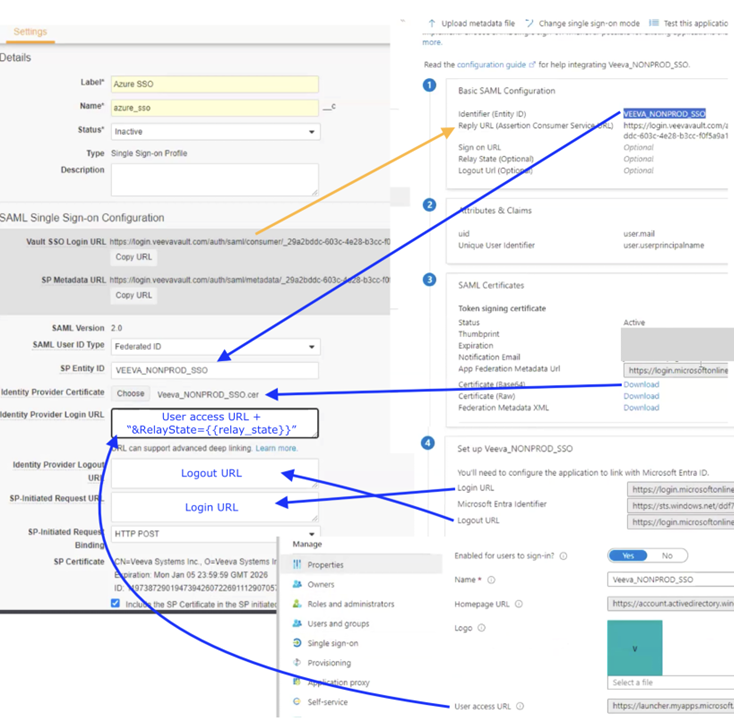
The image below contains an overview of the configurations between Vault and Azure.
Note User Access URL is coming from the Properties Page and appending of &RelayState={{relay_state}} to that URL. The rest of the settings can be found in Single sign-on Section of Azure Application that was created.
-
Save the updates.
-
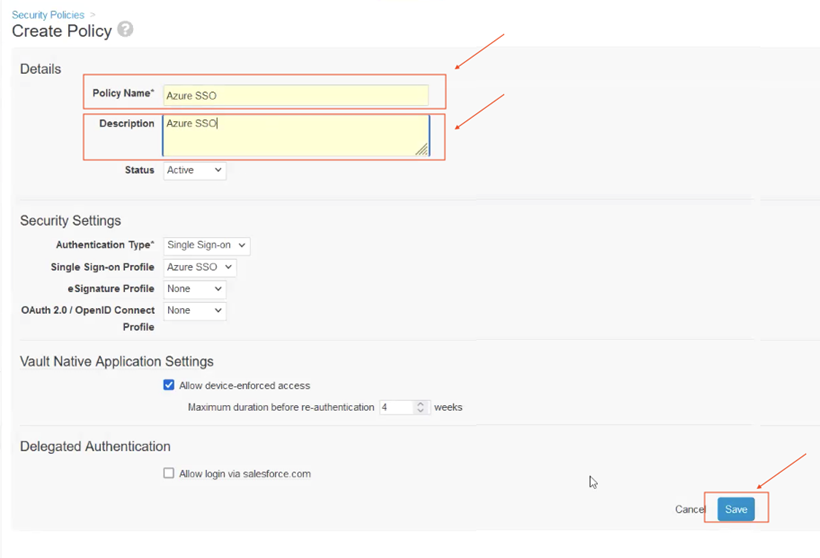
Navigate to Admin > Settings > Security Policies, click create, and select Single sign-on.
-
Enter the following details, then click Save. Note that the Single Sign-on Profile field should be populated as “Azure SSO.”
- Policy Name: Azure SSO
- Description: Azure SSO
- The remaining fields can be left as the default.
- Create your users with the new Security Policy and their federated ID.
